In this series of articles we will be offering fundamental help and advice to amateur and semi-pro audio/visual producers who use Sony Vegas and want to incorporate music, voice overs and SFX in their productions.
Introduction
Sony’s Vegas Pro® is an excellent creative tool for audio/visual work. It’s intuitive and powerful, and especially good when it comes to adding those extra touches that will make your presentation stand out from the rest.
Vegas 8.1 ramps up the 64 bit & Surround capabilities, but for these tutorials we’ll stick to something a little less involved. Vegas Pro 8 gives perfectly good results. You can access an unlimited number of 24bit/192kHz audio tracks as well as 30 real time effects including support for VST and DirectX. So that’s more than enough for any low budget audio promo job like the one I have in mind for this tutorial.
Getting Started
Because we’re concentrating on music and audio capabilities of Vegas, let’s say we’ve been commissioned to produce a short audio promo ad. It will be broadcasted at regular intervals between the music over the P.A. system at a ‘garden centre’ to advertise their “credit crunch” deals. Sure, we’d all love to be doing the next Jay-Z album promo for Radio Urban 248, but this is the real world and Jay-Z just ain’t returning your calls. So in the meantime, it’s down to the garden centre to earn a few bucks!
We’ve already been given a 30 second voice over WAV file recorded at a local studio, which we’ve saved to a folder called ‘Garden Centre Promo’. And now it’s time to open Vegas Pro 8 and get to work on the project.
Click on ‘File’/‘new’ and check that the audio properties are set to 44.1kHz with a bit depth of 16. Set the resample and stretch quality to ‘best’ as we may have to play around with the duration of the audio files. Click OK and let’s move on.
-

Jay-Z just won’t answer your calls.
Choosing some music
You preview the V.O. file and they’ve done a pretty good job. It’s a female artist, good diction, clear, accurate and appealing. What it needs is a great sounding music bed that’s not too obtrusive and sits nicely with this pleasant sounding voice.
One good place to look for music that you can legally use would be the Stock Music collection at Shockwave-Sound. They’ve never let you down when you’ve needed quick and easy royalty free music solutions and whaddaya know? This time is no exception. Within minutes of searching you’ve got a whole ream of quality tracks that may just be suitable for the garden centre promo ad.
The track that really stands out is called ‘Rain Or Shine’ by Pierre Langer. It’s a kind of light and airy acoustic piece that has quite a wholesome feel. The track description uses the terms ‘outdoors’, ‘nature’ and ‘uplifting’, which certainly fits the bill for our garden centre clientele. What’s more, at only 38 seconds it’s a great length for a short promo. It resolves too, so we won’t have use a fade out, so that’s a bonus.
Importing the music into Vegas
Initially, there’s no need to commit to buying the track before we’ve tested it alongside the voice over.
We can listen to the track using Shockwave’s preview facilities. And play the V.O. file alongside at the same time. At least it will give a rough idea of whether the two elements work well together.
Once we’re happy that we’ve made the right choice, it’s time to purchase the track, download it to our ‘Garden Centre Promo’ folder and import it into Vegas.
Vegas can read any number of different audio formats, WAV, MP3, WMA, PCA, AIF, MPEG audio and AC-3. I’ve chosen to download the track from Shockwave as a WAV file.
To import into your project, first create an audio track in your ‘track header’ by either going ‘insert’ and ‘audio track’, or by right clicking in the track window and choosing ‘insert audio track’. Highlight the track and go to ‘file’/’open’. The ‘open’ box offers the option ‘Files of type’. Make sure this is set to ‘All Project & Media Files’ so that Vegas will recognise all associated files. Alternatively, you could use the drop down menu to go to ‘Wave (Microsoft) *wav’ so that it will specifically recognise that format. But best left to the default ‘All Project & Media Files’. Browse to find the ‘Garden Centre Promo’ folder, highlight the WAV file and open it. The WAV will appear on the designated audio track in the timeline next to the cursor.
Now double click on ‘track name’ in the ‘track header’ and rename the track ‘Music Bed’.
Put the file at 00:00:00 in the project window. If you wish to move it, simply grab it by holding down your left mouse button.
As soon as you’ve imported an audio file it’s a good practise to make sure there is a good sturdy limiter plug-in on the output level. Most professional music files will peak at 0.00db, but to be sure that your project never exceeds this, Vegas provides a number of plug-ins with limiting in mind.
Go to your master mixer and click the master effects icon. Choose a limiter or peak master plug-in and set it to 0.00db (they normally default at this setting). Doing this will avoid any nasty clipping or peaks later on.
-
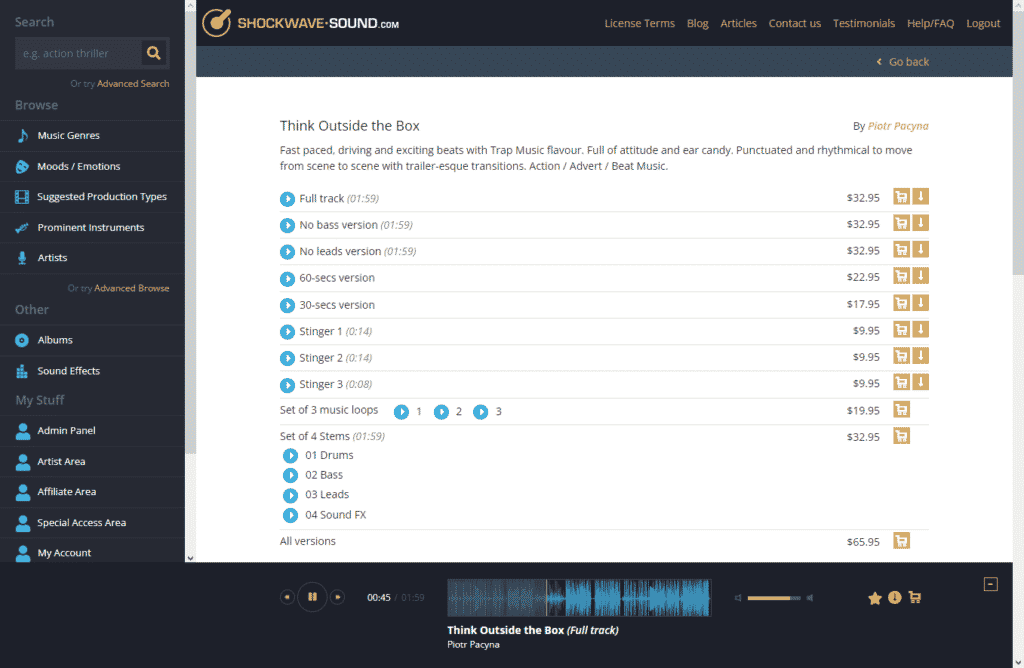
Preview the music using Shockwave-Sound’s media player.
Importing the voice over into Vegas
At this point, let me mention Vegas’s Project Media function. It’s a way of grouping together all your media making it available at your fingertips for immediate use. You can drag and drop files from the ‘media bins’ into your project window easily and efficiently. And this can often cut down on time spent on project management. It may be something we will refer to in greater depth in later tutorials. For this simple exercise, its use is limited.
Check it out by clicking on the ‘Project Media’ tab above the project window.
Now that we’ve got our music bed lined up, we can import our voice over into the project window. We do this in the same way that we imported the music bed, but onto a separate audio track that we can name ‘Voice Over’.
Our project now consists of two audio tracks. The ‘Music Bed’ and the ‘Voice Over’. These are the only files we require for this project. Once we have saved the project as a .veg file to our ‘Garden Centre Promo’ folder we can begin work on the project.
Preparing the ‘Voice Over’ file
By clicking on the exclamation mark in the ‘track header’ of the ‘Voice Over’ track, I can solo the voice and play it without hearing the music bed as well.
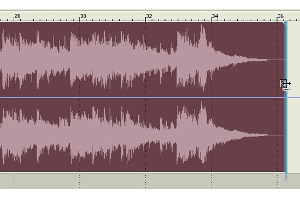
I notice from doing this and also looking at the waveform, that there’s a few seconds of dead air at the start of the voice over file that need removing.
There’s a number of ways to do this. You can right mouse click on the file to reveal the drop down menu. Here you will see the options, ‘open in trimmer’ or ‘open in Sound Forge’ (this is dependant on you having Sony’s Sound Forge designated as your assigned audio editor). These options are perhaps better for more detailed editing. For a simple thing like this, it’s easiest to remove the dead air from the audio file whilst it’s still in the timeline. Do this by grabbing the start of the file in the ‘square icon’ zone (see illustration) and pulling it towards the right until the edge matches up with the very start of the waveform.
If need be, you are also able to ‘scrub’ in Vegas by grabbing the curser and pulling it back and forth. For those who may be used to analog editing (fairly unlikely these days!), this is a useful and familiar method. But the accuracy of the timeline really out weighs the necessity for such things. (But it sure makes a nice sound, don’t it?). OK, we’ve done a quick snip, so now we’ve got a voice over that begins immediately at the start of the file.
Now the voice over file no longer starts at 00:00:00, so we need to drag it back to the start in the project window. Here’s a tip while dragging files around in the Vegas project window. Make sure the ‘auto-ripple’ function is disabled first. (That’s ‘ctrl+L’ on a PC. Or you can click on the ‘auto-ripple’ icon on the toolbar.) It’s a great function, because it means you can shift all your media around in one go, just by grabbing one file. But if you leave it on, you can displace everything in your project unintentionally, which is a real pain!
So with ‘auto-ripple’ disabled, we can drag the shortened ‘Voice Over’ file back to 00:00:00.
Deciding on duration
OK, things are looking good for our garden centre promo ad. We have a project set up that includes a voice over and a music bed and we’re ready to mix and match the elements so they sound good together.
We’ve established that our voice over is 30 seconds in length, while the duration of the music bed is 38 seconds. Unlike radio or TV, where duration is of paramount importance, the broadcasts produced for this garden centre are fairly loose and the brief was to make the promo somewhere between 30 and 40 seconds in length.
So, for this exercise, let’s say that we’ve decided that the promo will be 35 seconds in length. This means, of course, that we will need to reduce the length of the music by 3 seconds from 38 to 35 seconds. For this we will need to rely on Vegas’s timestretching abilities.
Timestretching in Sony Vegas
Timestretching is a way of compressing or stretching out the audio without altering the pitch. A key use for this might be strict radio or TV commercials where the duration has to be exact. Or a remix where you want to alter the tempo of the vocal but keep the same key. There are lots of different applications for timestretching and in Vegas it couldn’t be simpler. For minor adjustments to duration, tempo or for BPM matching it’s perfect. And you can stretch audio on-the-fly in real time, so you can hear the results instantly and adjust accordingly.
So let’s alter the duration of the music from 38 seconds to 35 seconds without altering the pitch.
First highlight the music file.You can set the timestretch attributes on each separate audio file by right mouse clicking on the file and highlighting ‘properties’. Here you will notice a tab for ‘audio events’. Set the timestretch/pitch shift to ‘classic’, then take a look at the stretch attributes. There are 19 attributes that you may be familiar with if you have used Sony or Sonic Foundry timestretch plug-ins before. Each algorithm has a different overall effect on the way the timestretching behaves and consequently how it sounds. But generally for music, the ‘A03 Music 3 (less echo)’ attribute will be the best one to use. Certainly in this case, where we are stretching (or rather, compressing) an entire mixed track. Experiment with each attribute when you have time. It may help you make decisions about timestretching in the future. Once you’ve set the attributes, you can move on with the timestretching process.
-
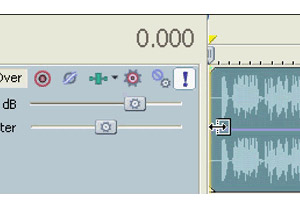
Press control and a wavy line appears under the icon
Here’s how you do it. First, highlight the audio file and magnify to a reasonable size using the zoom tools in the bottom right hand corner of the project window. Then position your mouse curser at the end of the file and run it up and down the far edge. You’ll notice the attached icon displays 2 different modes. When you are close to the top right angle (where there’s a blue triangle), the curser displays a curved icon. This is the ‘fade’ function. To alter the fade offset you would need to grab that blue triangle and push it backwards. But for timestretching, you need to move your mouse curser out of that zone and down the vertical edge of the file. You’ll notice that the icon alters to a square shape. This is the area we’re interested in. Hover the curser about midway down the vertical edge and press the ‘control (Ctrl)’ key on your PC keyboard. You’ll notice a wavy line has appeared under the square icon (see illustration). Now you’re in timestretch mode. Keep that control button down and grab the edge of the file (a blue line will appear signifying your start point). Drag the vertical edge backwards (to make the duration shorter), or forwards (to make it longer).
Yep, it’s that simple. If you preview the track while altering the duration you will hear the effect instantly with no processing time. You’ll also notice that a yellow box has appeared in your timeline. The numbers in the box signify the amount that you are stretching in seconds, frames, samples, measures or beats. Whatever mode your timeline is set to, in fact. If you wish to alter this mode, right mouse click on the timeline to reveal a drop down menu displaying your options and alter accordingly.
Of course, there are limits to just how much timestretching is acceptable. For a start, the composer will have chosen the tempo of the music for specific reasons. Stretch it too much either way and it may alter the mood. Also, there’s the technical aspect to consider. Listen carefully to the track once you have stretched it. Although the algorithm is exceptionally good in Vegas, there will be degradation of the sound. Most algorithms will work well up to 130%. Vegas goes way beyond that and still sounds good. But it’s a personal choice depending on your project and the acceptable levels of sound manipulation.
For this exercise, I simply grab the end of the music bed file, press ‘control’ and drag the file duration back from 38 to 35 seconds.
In the next part of the tutorial we will be looking at how to mix audio files using manual and automated mixing. We’ll also be checking out FX processing and plug-in applications. As well as the rendering process and CD burning facilities. That’s in part two of this ‘Working with audio in Sony Vegas tutorial’.
Resources:
Audio editing software at Fixthephoto
Vegas Pro product page at Sony Media Software
Royalty-Free Music by Pierre Langer at Shockwave-Sound.com
More in this series:
You may proceed to Part Two of this series.