“When some things are harder to hear and others very clearly, it gives you an idea of depth.” – Mouse On Mars
There are a few things that immediately allows one to distinguish between amateur and professional mix. One of them is depth. Depth relates to the perceived distance from the listener of each instrument. In amateur mixes there is often no depth at all; you can hardly say which instruments are in the foreground and which in background, simply because all of them seem to be the same distance from the listener. Everything is flat. Professional tracks, in turn, reveal an attention to precisely position individual instruments in a virtual space: some of them appear close to the listener’s ear, whilst others hide more in the background.
For a long time people kept telling me that there was no space in my mixes. I was like: guys, what are you talking about, I use reverbs and delays, can’t you hear that?! However, they were right. At the time I had problems understanding the difference between using reverb and creating a space. Serious problems. The truth is – everyone uses reverbs and delay, but only the best are able to make the mix sound like it was three-dimensional. The first dimension is of course panorama – left/right spread that is. The second one is up/down spread and is achieved by a proper frequency distribution and EQ. The third dimension is the depth. And this is what this text is going to be about.
There are three main elements that help to build the depth.
1. Volume level
The first, the most obvious and pretty much self-explanatory is Volume Level of each instrument track. The way it corresponds to the others allows us to determine the distance of the sound source. In a situation where the sound is coming from a distance, its intensity is necessarily smaller. It is widely accepted that every time you increase the distance twice the signal level is reduced by 6 dB. Similarly, the closer the sound you get, the louder it appears.
It is a very important issue that often gets forgotten…
2. Time the reflected signal needs to reach our ears
The second is the time taken by the reflected signal to reach our ears. As you all know, in every room we hear a direct signal and one or more reflected signals. And if the time between these two signals is less than 25-30ms, then the first part of the signal gives us a clue as to the direction of the sound source. If this difference increases to about 35ms or more, the second part of signal gets recognized by our ears (and brain) as a separate echo.
So, how to use it in practice?
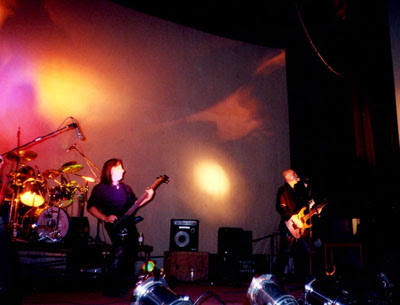
Due to the fact that the PAN knobs are two-dimensional and keep moving from left to right, it’s easy to fall into the trap of habitually and set everything in the same, dull and obvious way – drums here, piano there, the keys here… as if the music was played in a straight line from one side to the other. And we all know that is not the case. When we are at the concert we are able to hear a certain depth, “multidimensionalism” quite brilliantly. It is not hard for us to say, even without looking at the scene, that drummer is located in the back, guitarist slightly closer to the left side, and the singer is in the middle, at the front.

And although the relative loudness of the instruments is of great importance for creating the real scene, it’s the time the signal needs to arrive to our ears that really matters here. These very tiny delays between certain elements of the mix get translated by our brain into meaningful information about position of sound in space. As we know, sound travels at a speed of approximately 30cm per 1 millisecond. So if we assume that in the case of our band the snare drum is positioned 1.5m behind the guitar amps, then snare sound reaches us 5ms later than the signal from the amplifier.
Let’s say that we want to make the drums sound like they were standing at the end of the stage and near the back wall. How to do that? When setting reverb parameters remember to pay attention to ‘pre-delay’. This element allows us to add a short delay between the direct signal and the reflected signal. It somehow separates the two signals, so we can manipulate the time, after we’ll hear the echo. It’s an extremely powerful tool in creating a scene. Shorter pre-delay means that the reflected signal will be heard almost immediately after the appearance of the direct signal; actually the direct and the reflected signal will hit our ears almost at the same time. And longer pre-delay, however, moves the direct signal away from the reflective surface (in this case the rear wall). If we set a short, few ms delay to the snare, longer one for the guitar or even longer for the vocals, it would be fairly easy for us to catch the differences. Vocals with a long pre-delay sound a lot closer than the snare drum.
We can also play along with pre-delay when we want to get a real, natural piano sound. Let’s say we place the piano on the left side of our imaginary stage. When sending it to a stereo reverb let’s try to set a shorter pre-delay for the left channel of the reverb, because in reality the signal would bounce back from the left side of the stage (from the side wall) first.
First we have a dry signal. Then we are in a (quite big) room, close to the drummer. And then we are in the same room again, but this time the drummer is located by the wall, far from us.
3. High frequency content
The third is the high-frequency content in the signal. Imagine that you are walking towards the concert in the open air or a pub with live music. What frequency do you hear most of all? Of course the lowest. The closer to the source of music we are, the less dominant “basses” are. This allows us to conclude that the less high frequencies we hear, the further the sound source is, hence a fairly common practice that helps to move the instrument to the background is a gentle high frequencies rolling off (instead of bass boost) by LPF (low pass filter).
I often like to additionally filter the returns of reverbs or delays – the reflections seem to be more distant this way, deepening the mix even more.
Speaking of bands, we should also pay attention to frequencies somewhere around 4-5kHz. Boosting them could “bring up” the signal to the listener. Rolling them off will of course have the opposite effect.
“It is totally important when producing music that certain elements are a bit more in the background, a bit disguised. It is easiest to do that with a reverb or something similar. In doing that, other elements are more in focus. When everything is dry, in the foreground, it all has the same weight. When some things are harder to hear and others very clearly, it gives you an sense of depth. And you can vary that. That is what makes producing music interesting for us. To create this depth, images or spaces repeatedly. Where, when hearing it, you think wow, that is opening up so much and the next moment it is so close again. And some times both at the same time. It is like watching… you get the feeling you need to read just the lense. What is foreground and background, what is the melody, what is the rhythm, what is noise and what is pleasant. And we try to juxtapose that over and over again.” (Mouse on Mars)
Problematic Band
All modern pop music has one thing in common: it is being recorded at a close range, using directional microphones. Yes, you’re right, it’s typical for near-field recording. This is the way how most instruments are recorded, even those you don’t normally put your ears to – bass drum, toms, snare, hihat, piano (anyone puts his head inside the piano to listen to music?), trumpet, vocals … And yet even musicians playing these instruments (and for sure the listeners!) hear them from a certain distance. Musicians too – it’s important. That’s the first thing. And second – the majority of studio and stage microphones are cardioid directional close-up mikes. Okay, these two things are a quite obvious, but you’re wondering what is the result? It turns out that we record everything with the proximity effect printed on tracks! Literally everything. In short, the idea is that directional microphones pick up a lot of the wanted sound and are much less sensitive to background noise, so the microphone must handle loud sounds without misbehaving, but doesn’t need exceptional sensitivity or very low self-noise. If the microphones get very close to the sound source – within ten or so microphone diameters – there’s a tendency to over-emphasise bass frequencies, but between this limit and 100 cm maximum limit, frequency response is usually excellent.
Tracks with the proximity effect printed sound everything but natural.
Everyone got used to it and even for the musicians their instruments recorded from a close distance sound okay. What does this mean? That all of our music has a redundant frequency hump around 300Hz. Some say that it’s rather 250Hz, others that 400Hz – but it’s more or less there and it can be
concluded that almost each mix would only benefit from taking a few dB’s off (with a rather broad Q) from the low-mids.
Rolling off these freq’s will make the track sound more “real” in some way and it’s also actually something common on the sum. The mix gets cleaned up immediately, loses its muddyness and despite the lower volume level it is louder. Low mid appears to not contain any important musical information.
And this problem affects not only the music being recorded live – the samples and sounds are all produced as customers want it and it means they are “compatible” with the sound of the microphone. So it is worth to get familiar with that issue even if you produce electronic music only.
The bottom line is: if you want to move the instrument to the back – roll off the freq’s around 300 Hz. If you want to get it closer, simply add some extra energy in this range.
Continue to part 2 of this article >

About the author: Piotr “JazzCat” Pacyna
is a Poland based producer, who specializes in video game sound effects
and music. He has scored a number of Java games for mobile phones and, most
recently, iPhone/iPad platforms. You can license some of his tracks here.