by Terry Wilson
As a sound editor and designer, the most important thing is re-enforcing the visual landscape presented to the audience; providing an audible focus, and creating sonic cues to match the pictures.
The vast majority of low and mid budget film & TV productions are set in the real world, or in everyday life that we see around us, so the sounds in the final production should be sounds that we should all have heard before in some way shape or form.
This article is about some basic principles to follow and techniques to apply in creating the sonic landscape to complement a director’s vision. It’s about faking what people perceive to be real, as opposed to creating new sounds from nothing, and it assumes you are in a position of limited resources and don’t have the time and money of a hollywood film budget to get the sound mix done. I have deliberately avoided talking too much about working with dialogue or ADR as it’s a subject that really deserves an article in it’s own right, even though many of the principles here do still apply.
In real life, people have an incredible ability to filter out a huge amount of the surrounding sonic landscape and zero-in on what they need to hear. We all do it unconsciously and we only really appreciate it when we’re challenged with doing the opposite, such as trying to listen to two conversations at once (see cocktail party phenomenon). In the world of reproduced audio with dynamic range, harmonic content and spatial awareness all dramatically reduced if not gone, it’s your job to be the “human filter” and help decide what the audience needs to hear in order to make sense of the world they’re being presented
with.
The two key priorities which you should remember to help you do this are:
- Create a world which has distractions removed as much as effects put in.
- Create a world which is believable as opposed to “real”.
A director of photography uses light, framing and depth of field to get the audience to focus on the most important part of the picture. The basic principle of mixing sound is the same: The focus should be clear, crisp and sharp while the background is more indistinct, helping to create the required sense of space and time.
Removing Distractions
Backgrounds stop becoming backgrounds if they have sounds which too readily pique your consciousness. Everyday sounds like ambulance sirens, construction, airplanes, car horns, even the unnecessary rustling of clothes should all be removed if they’re not part of the story, as they and many other sounds can potentially divert the audience away from the action.
You may be limited by what got recorded with the dialogue but you should do all you can to get rid of potential distractions. This often means creating a soundscape from scratch and layering sounds together; a bit of ambient wildtrack, with a few footsteps and a couple of bird calls may be all it takes to recreate a lot of outdoor ambiences. But it’s important to remember whether it’s background or foreground sounds you’re creating. A shot of people going down a flight of stairs can be a noisy foreground, but the moment two people on the steps come into picture and starts having a conversation, the footsteps must be part of the background and not intrude on the dialogue.
The other key to a realistic soundscape is to think of the one or two “key sounds” that help the audience very easily and quickly identify the environment. Airports and trains stations have distinct tannoy sounds; coastal areas have seabirds, offices have phones and photocopiers, shops have cash registers and scanners, cafés have an FM radio on in the background. Throw in just one or two of these in the right place (particularly with the establishing shots at the beginning of a scene) and it’s often all you need to help convey the location and atmosphere. Use people’s preconceived expectations of how something should sound to your advantage. But be sparing and don’t intrude on the pictures.
This segways neatly onto the second principle of believability. People often expect things to sound a certain way for film / TV, even when they don’t in real life. I have a really old pair of Nike sneakers which make a “clip clop” sound when I walk on a hard surface, but if anyone were to see a close up of them and hear that “clip clop” sound alongside them it would be pretty off-putting; the audience expects trainers to sound like Michael J Fox’s sneakers in Back to the Future, not like a pair of high heels! Similarly, if I ask you to imagine the sound of a car being remote locked, you’ll all conjure up the same one or two sounds that everybody knows they make. Except in the “real world” most car locks don’t make that sound, they make a rather boring “thud”, so in order to maintain the audience’s expectations you need to get your shot of the car being locked to make that sound. Especially if the car being locked is relevant to the story. The obvious exception would be if you had a close up of the lock moving, then you could use the “thud” because it sonically matches what the audience sees.
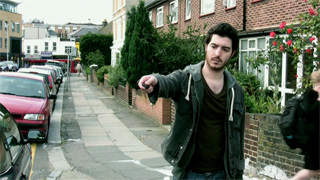
No prizes for guessing what he’s doing…
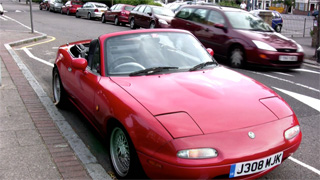
or what sound this is going to make!
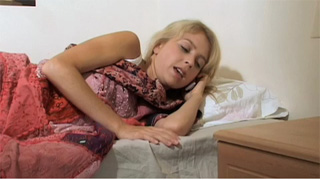
The other situation that is never real but has to be faked for the sake of the story is when you’re witnessing the receiving end of a phone call. In real life someone standing from the Camera’s point of view could never hear the other side of the conversation, but for the sake of the audience and the story you have present that “unreality” so people understand what’s going on.
Get some perspective
Where a sound occurs in relation to the action can have as much effect on it’s believability as the sound itself. This is where having sounds recorded from multiple perspectives really helps, but often you don’t so you need to improvise.
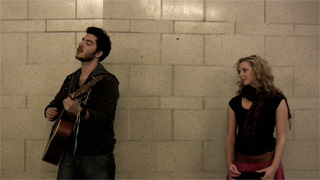
Degrading a sound and making it more distant sounding is much easier than doing the opposite, so it’s important to get hold of the cleanest and closest version of a sound available. Then it’s a case of matching the perspective to the picture. Take for example a phone ringing on a desk. An establishing shot with the phone 3-4 metres away needs to sound different than a close up.
Changing the volume is the first step, but there are other tricks to help fake the positioning. A bit of reverb on the phone sound (to match the room accoustic) will help; a “wetter” reverb for the more distant shot will help shift the perspective. It may be that the story demands that even the distant sound is relatively “clean” in which case changing the predelay more noticeable from one shot to the other may help more than dry/wet.
The other thing that also helps change perspective is EQ. If a sound is further away, it’s generally perceived to have less prominent lower frequencies. Try using a high pass filter or parametric EQ with a node around 100-200 Hz and subtly change it from one shot to the next, with more removed for the more distant shot. It should produce a noticeable difference which is immediately more subtle yet more believable than reverb alone.
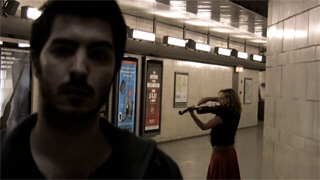
Sometimes what you can see in a picture necessitates a less rigid adherence to perspective, and more simply what’s in the shot. The two shots below show two POV’s of a busker in an underground station. In one you can see the cavernous background but in the other all you see is the the busker against a wall.
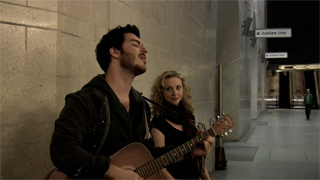
Even though the distances from the camera are similar, it makes more sense to have the front shot “cleaner” because there’s less visual information to back up a more echoey sound.
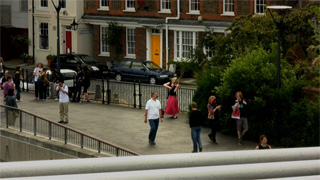
The great outdoors
Another tricky problem with faking perspective is when you need to take a clean studio sound and make it sound like it’s outdoors. Reverb becomes a big no no because it immediately creates a sound associated with interiors. But EQ is still a powerful tool and most outdoor sounds naturally come across as less bass heavy than their interior counterparts. Exterior spaces are generally a little rougher and less apparent, and the sense of greater space naturally creates a feeling that sounds don’t need to come through as clean as an enclosed indoor environment.
If the action takes place in an environment surrounded by hard or reflective surfaces adding a small delay to the sound to helps it to become part of the nearby environment. But be very subtle and don’t overdo it. As with interiors, it’s more about the change of perspectives to match the action. Be led by the pictures and go with what feels right and doesn’t jump out as “wrong”.
Sound from boxes
An often required trick is to take something that’s clean, like a piece of dialogue or music and make it sound like it’s coming from something else, like a radio, mobile phone or PA system. Most of these sources are fairly straightforward to mimic. Phones, radios, answer machines and other such devices need generous amounts of EQ, with most of the lower and higher frequencies removed, and the midrange frequencies cranked up. What also helps is heavy compression or limiting and sometimes some overdrive or distortion to help create that sense of poor quality playback you expect from small speaker devices. If you are doing a lot of this kind of compression just make sure you’re adjusting the final volume to compensate.

With louder sounds like PA systems, it’s not that different. Use similar EQ & compression but add lots more distortion and finish off with delay / reverb to match the environment’s acoustics.
You’ll often find digital editors have dedicated plug-ins (such as “phone effect”) tailored for these kinds of effects. By all means try them out but I find doing it from scratch is just as easy and generally more controllable.
Sounds from other rooms
If you’ve got dialogue or sounds that need to sound like they’re coming from rooms not directly shown in the picture then again, EQ and reverb are the tools of choice.
Start with reverb and use a fairly neutral algorithm like a plate reverb. Get rid of any predelay, move the wt / dry mix to around 50% and use a short decay time of between 150-300ms. If you have a diffusion option I’d recommend switching this off and using your pan controls to dictate where the sound should be coming from.
With your reverb working, use a low pass filter on your EQ to get rid of higher frequencies. The more you remove, the more it will feel like it’s behind a solid wall, but if the story necessitates easily distinguishable dialogue then it’s going to have to be subtle. Again, losing some lower frequencies may also help, especially if you need a change in emphasis. And finally, go back to your reverb’s wet / dry control and adjust it till you’ve got the right level of “distance”.
Workflow
No digital audio workstation has an infinite number of tracks so when you’re working on processing lots of sounds in multiple different ways you’ll have to decide on a workflow to deal with it. The main choice is whether to keep effects as real time or to render them off as processed audio files. It’s a trade off between track count (processor demand) and future flexibility to make changes, and it’s a result of not having the perfect sounds in the first place.
Systems like Pro Tools and Soundtrack Pro give you the ability the automate just about every parameter of every plug-in and automation can help you stay in a real time environment when otherwise you’d have run out tracks. The drawback is the increased complexity in dealing with automating several parameters of many plug-ins across multiple tracks, which if you’re not very attentive to detail can get very confusing.
If you’re less keen on going down the real time route then an option is to use a clean project and create around 4 – 8 perpectives for each sound you’ll need in each environment, or scene. While this sounds straightforward, you’ve got complexity issues here too; you’ll need an efficient method for labelling and accessing sounds, and the quantity of audio in your project is going to increase quite a bit.
My preferred option is to stay in a real time environment for as much as possible. Coming from a predominantly audio background I’ve got comfortable with having every parameter adjustable with instant real time results in a way that the processing demands of video still struggles to keep up with. However if you have more of a video background you might be
more at ease with the “render off and import” style workflow.
One big benefit of keeping processing real time is when you have to gradually transition a sound from one perspective to another. For example a tracking shot that follows a subject entering a kitchen with a boiling kettle, or a change in atmos due to a door being opened / closed. This is where plug-in automation comes into it’s own, giving you the ability to fluidly track the perspective with the action.
Resources
If you don’t happen to work next to a foley studio or haven’t got the kit to record sounds yourself there are a number of sites that allow you to search, download and preview sounds you’re after. Here at www.Shockwave-Sound.com we have a rich and varied library of professional, royalty-free sound effects for instant download. Visit our main front page to get started with that.
Mixing real world environments can be a time consuming but rewarding process. I think the trick is not to get too hung up on obsessive attention to detail but get the “feel” right. Spend the time on the things that are going to make a difference to the audience; the backgrounds that will subconsciously help them know where the scene is and the foregrounds that leave them in no confusion as to plot and direction.
 About the author: Terry Wilson is a promo producer and sound designer. He’s produced promo films for the BBC’s Global News Division and has been an editor and sound designer on short films. He has written and produced radio promos and brand campaigns for the BBC World Service and mixed radio documentaries for the BBC’s national UK radio networks. You can see some of his work at www.pixelkisser.com or contact by email – [email protected]