Why Record for Perspective?
I remember a time I first began editing when I was struggling to make a car door slam match the picture on film. I shifted the sound earlier, later, added and removed elements and it still didn’t fit. The editor who was mentoring me said:
If you’re trying too hard to make a sound fit, then you’re using the wrong sound.
He told me why: the car door sound effect should have been correct (it was the proper model and year), but it had been recorded inches away from the car. In the scene the camera was a few meters away from the car. This difference made the sound jarringly wrong.
In other words, no matter how you synchronize the sound with the picture, if the actual nature of the sound is wrong, it will never work. This taught me how important it is to use the proper sound:
• correct volume
• correct timbre
• correct perspective or apparent distance
Cheating the Effect
Of course, volume is easy to adjust. If the timbre is wrong, you can choose another sound from the same family. However if the sound’s perspective or apparent distance doesn’t match the picture, no matter what you try it will never completely fit.
Simply raising or lowering the volume of the sound may seem to make the sound closer or further away, but this is only a ‘cheat’. The match will be close, but will invariably seem subtly, disturbingly, off.
What About Using Reverb?
One common trick is to apply reverb to closely-recorded sounds to make them seem further away. Even the best reverb plug-ins cannot replicate perspective perfectly, however, and the result will sound slightly odd. How do we solve this problem? Read on.
What is Perspective?
Perspective describes how close a sound appears. Typically a sound’s perspective is described in four ways:
- Close (anything under 10 feet/3-4 meters)
- Medium Distant (roughly 10 feet/3-4 meters away)
- Distant (anything more than 10 feet/3-4 meters away)
- Background or BG (quiet and muted)
Also:
- MCU or Major Close Up (inches away from the microphone, although this term is being phased out in favor of Close)
Here are some examples of a smoke alarm recorded at various perspectives. NOTE: it may help to wear headphones to hear the perspective or ‘space’ or ‘room’ properly (and have the volume down, the sound is sharp):
Notice how the Distant alarm has more echo, even though it is slightly louder than the Medium Distant alarm? The difference between these recordings is how much ‘air’ or space is apparent in the recording. ‘Air’ is created by a) the space where the recording takes place (also known as ‘room’) and b) the amount of reverb.
An Example: Woof
Imagine a dog barking in a city alley. A close recording will have prominent barks, and very little of the echo of the barks in the alley.
The further the dog is from the microphone, the more ‘air’ or ‘room’ will appear on the recording. The dog will seem quieter since it is further from the microphone. We will also hear more of the barks reverberating or bouncing off the alley walls.
It is exactly this aspect of the sound that we want. This distance, or perspective, will make it match perfectly with medium distant camera shots.
A recording of the close dog and one of the distant dog, although they are the same animal, will sound completely different.
Which Recording Perspective is Best?
So which perspective do you choose if you are going to record a sound effect? The short answer: all of them.
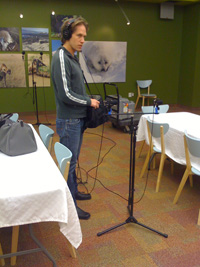
With today’s digital multi-track recorders you can record all perspectives at once. Patricio Libenson, the recordist for Hollywood Edge’s Explosions library, told me his set up involved multiple microphones, all at different distances and angled mathematically to account for phasing. The result is an incredibly rich collection.
Let’s return to our dog in the alley. We can set up one mic at the end of the alley, and have another next to the dog, both plugged into the same recorder. When the dog barks, we’ll have recorded both perspectives at once.
Match the Recording to Your Project
If you have to choose one perspective over the others, consider the project you are working on:
- Multimedia or Radio – it is always best to record close perspective for these projects. The reason? Distance has little value when you won’t be using picture or visuals. Also sound designers like the immediacy and power of close effects.
- Film or Television – most film editors prefer their effects recorded Medium Distant. The idea is that most camera shots are typically Medium Distant or further. Also, in a pinch you can fake a close perspective by raising the volume. In a perfect world they would like to have a Close version available as well.
Unfortunately, most commercial libraries are recorded close. Imagine you are trying to use a close dog bark in a scene where the dog is across the yard. It won’t fit.
That’s why at Airborne Sound we record two perspectives: close and medium distant, even if it requires multiple takes.
Conclusion
When you record sounds to match the requirements for your project, you’ll find the sounds fit easier, and require less editing. And, of course, it just sounds right.
About the author: Paul Virostek travels worldwide recording the sounds of cities and cultures. He shares his collection at airbornesound.com, and writes about his experiences field recording, and sharing sound effects at jetstreaming.org. He is also the author of “Field Recording: from Research to Wrap – An Introduction to Gathering Sound Effects“, which was published in 2012.


